

Here’s another new tradition, introduced to our family by my son-in-law Carl, who got creative and made a yule log cake last year. It so piqued my curiosity that I asked him for the recipe and decided to try my hand at making one for a Christmas dinner party this year. It’s a little more complicated than most recipes I shaare, but it isn’t really that hard, and it tastes pretty much divine! The first known yule log cake—bûche de Noël —was created by French pastry chef Pierre Lacan in 1895, although the tradition of burning a huge log (or tree) during the twelve days of Christmas began at least a century earlier in Germany, where a portion of a large log was burned every evening until “twelfth night,” which is January 6. Hence . . . you still have time to make one of these delightful yule log cakes to celebrate this week if you want to! Here is my own adaptation to an old classic:

Yule Log
(Serves 8-10)
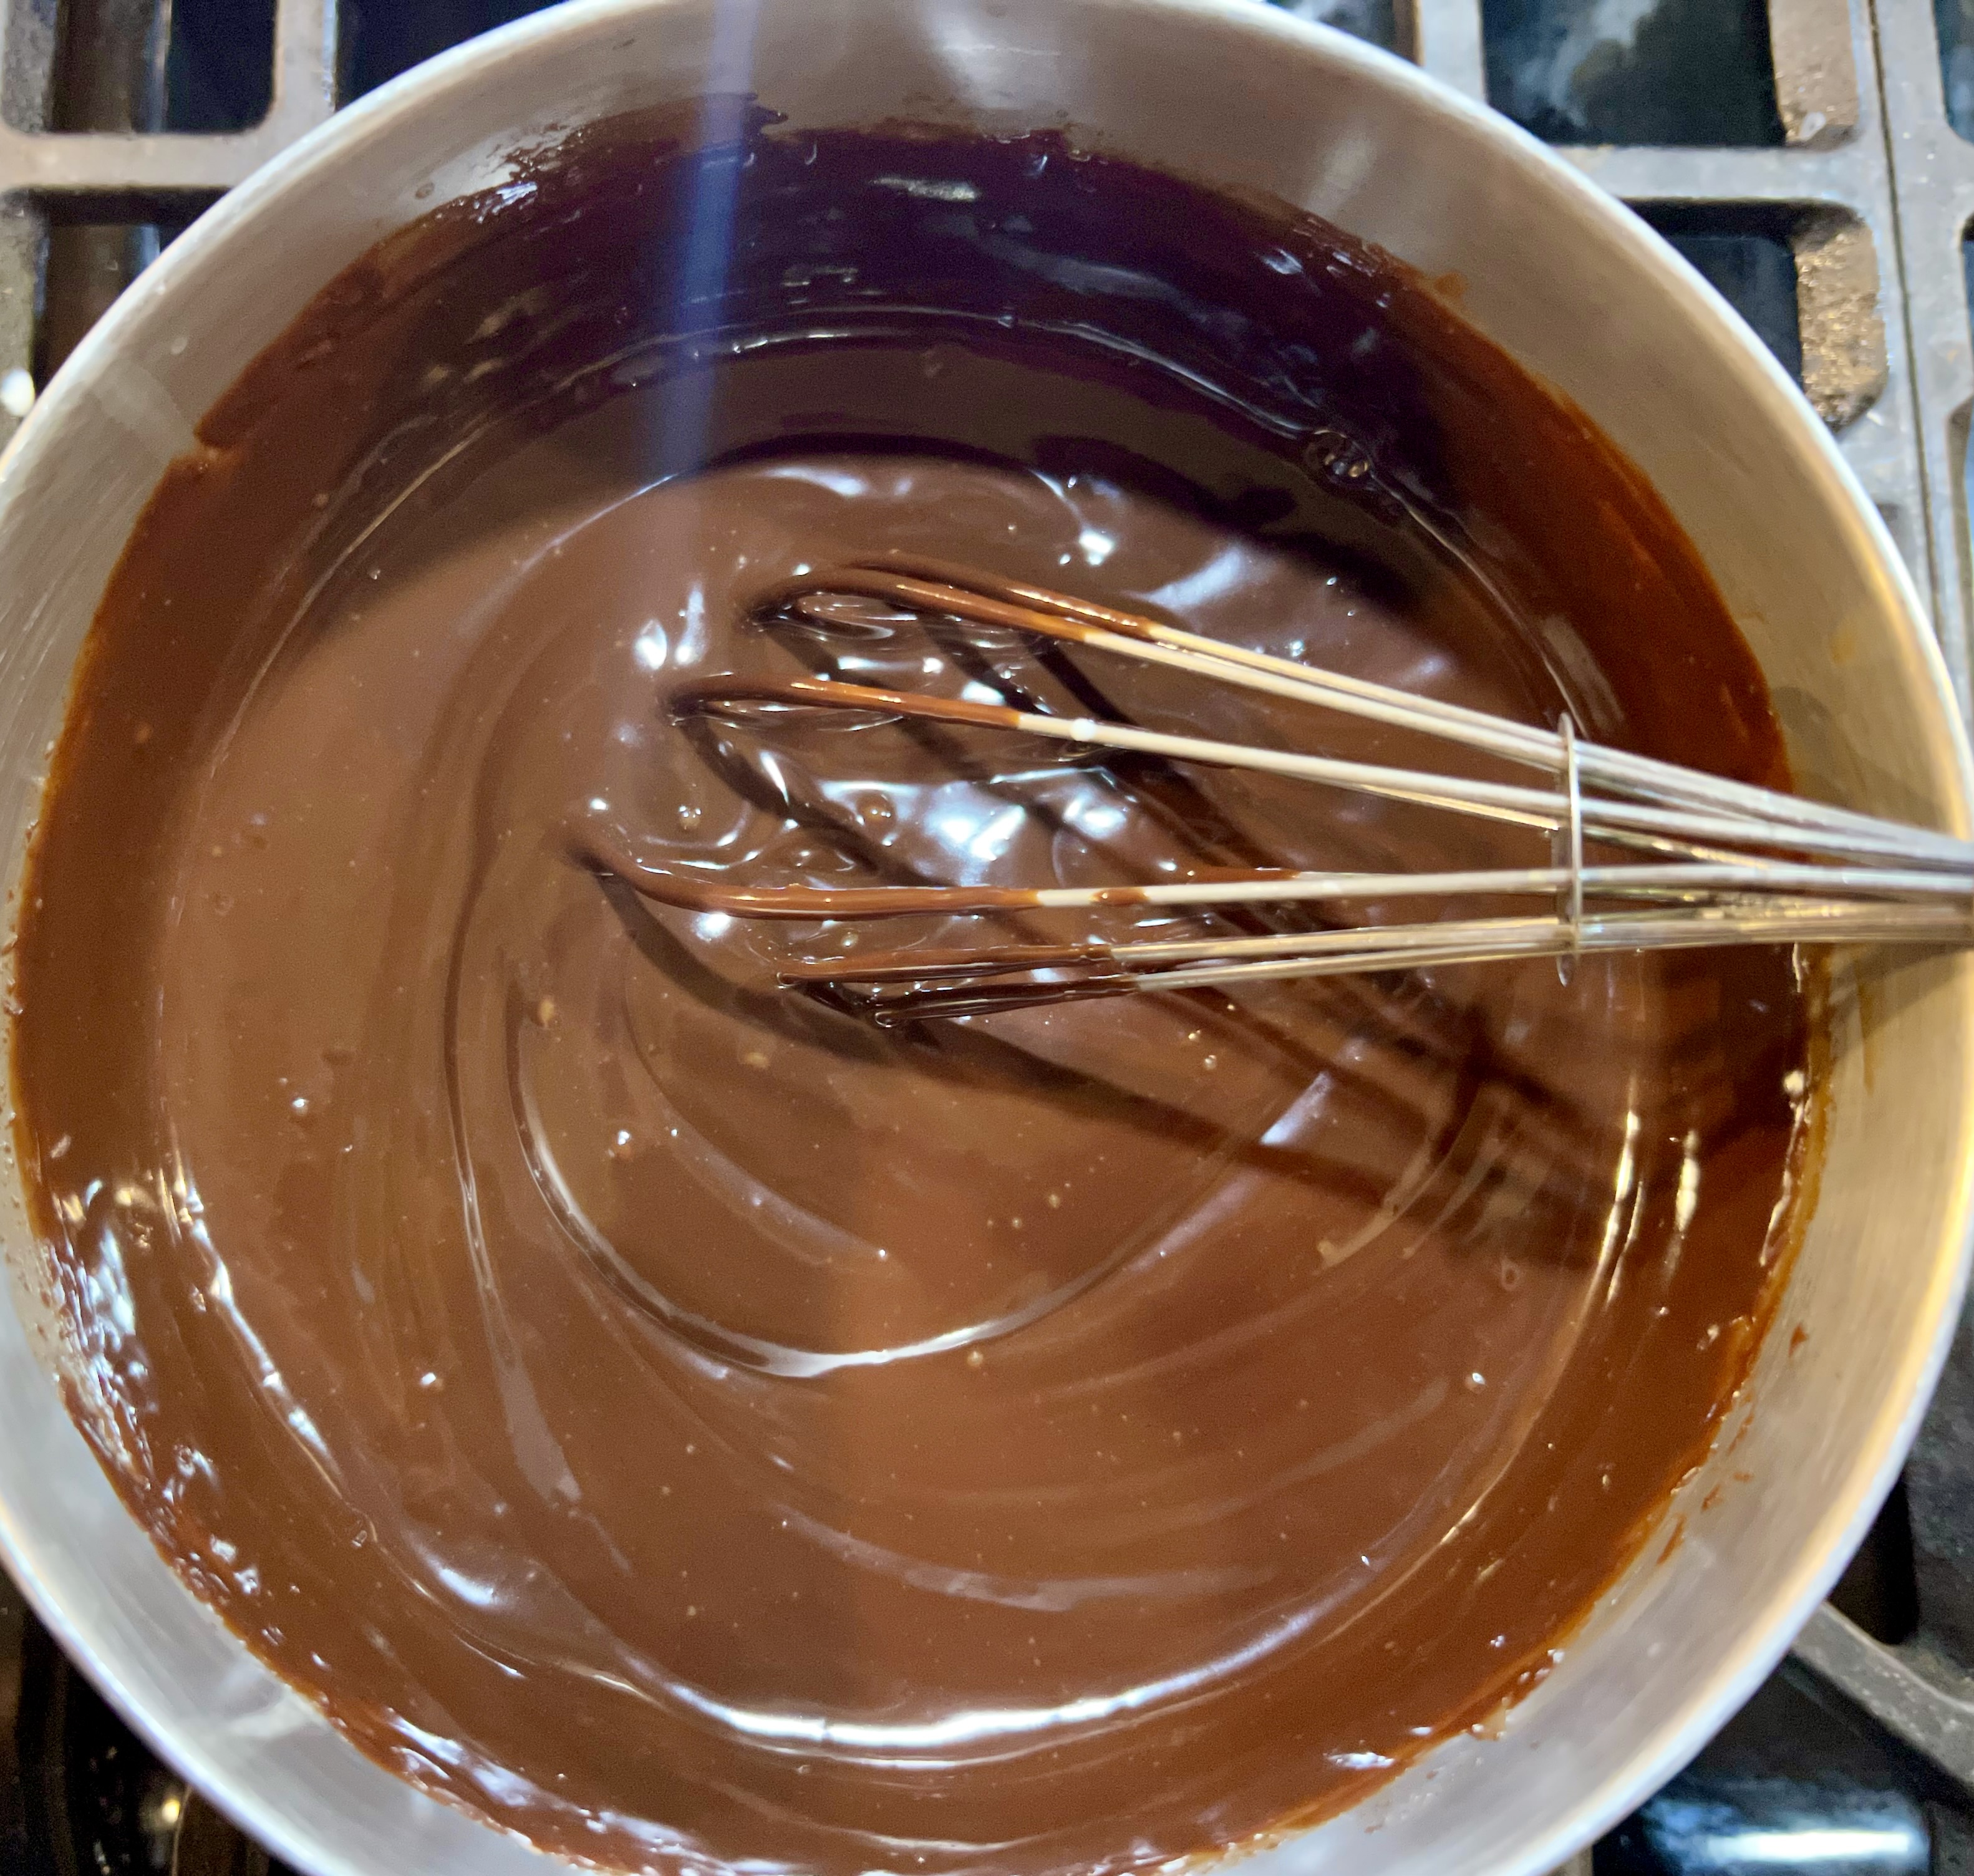
Step One: Start by making the ganache for frosting the cake:
In a saucepan, heat:
1 cup heavy whipping cream until just starting to simmer (about 2-3 minutes), then add:
12 oz chocolate chips (I like semi-sweet, but suit yourself)
2 tablespoons butter
1 teaspoon vanilla. Immediately turn off the heat and whisk together until it turns into a smooth, satiny mixture. Cool for 5 -10 minutes and then place in the refrigerator to chill until you’re ready to frost the cake.

Step Two: Prepare the cream filling:
In a mixing bowl, whip together until thick peaks form:
1 cup heavy whipping cream
1/3 cup sugar
1 teaspoon vanilla. This will take about 3-4 minutes on medium high speed. When it’s done, store in the refrigerator until you’re ready to fill the cake.

Step Three: Bake the sponge cake, but first preheat the oven to 425°F. and then line a 10X15″ baking sheet with parchment paper which has been cut to fit the bottom exactly with no extra paper around the edges.

Then, in a automatic mixing bowl place:
4 egg whites and whip them for 2-3 minutes, or until soft but distinct peaks form that cling to the beaters. Remove to a clean bowl and set aside for a few minutes.
Next, combine in the mixer:
4 egg yolks
1/4 cup unsweetened cocoa powder
1/3 cup flour
1 teaspoon baking powder
1 tablespoon instant coffee granules
1 teaspoon vanilla
1/4 teaspoon salt
Whip together until it’s a heavy, consistent dough.

Then, gradually add half of the well-beaten egg whites, taking care to run a spatula around the edges and bottom to make sure everything is mixed in and becomes a thick batter.

Finally, carefully hand stir in and mix the last half of the whipped egg whites. At this point, you want to be careful to mix only enough to make the batter consistent. Don’t over mix or the air bubbles will all pop, and you need them to make the batter light and frothy!

Gently distribute the batter over the entire surface of the baking sheet and with a gentle touch of a spatula, smooth the batter out. If possible, keep it on top of the parchment paper so it doesn’t touch the edges of the baking sheet (although I can’t do it perfectly).

Bake for 6-7.5 minutes in the oven. Check at 6 minutes with a gentle touch, but if the center doesn’t spring back up, then bake it for another minute or two until it does. You want it done, but not overdone lest the edges get too dry and brittle. Remove from the oven and set on the counter to rest for no more than 2-3 minutes.

While it’s baking (not after) prepare a tea towel by adding about a cup (or more) of powdered sugar to form a thick layer just slightly bigger than the 10X15″ baking pan.

While the cake is still hot, take a knife to loosen all the edges and then flip the entire cake out, upside down, on top of the powdered sugar.

Immediately and gently, pull off the parchment paper. (The paper is off in this photo, but it’s pulled off bits of the cake. That will happen; don’t worry about it!)

The next step is a little anxiety-provoking, but it really does work, although it has to be done while the cake is still hot, which means you’ll get your hot pads dirty! Oh, well, they’ll wash! Start at one end of the shorter (10″) side of the cake and roll it up in the tea towel. If you have a heavy coating of powdered sugar, it will work just fine and shouldn’t break apart. Leave it in this shape until it’s completely cooled. If you skip this step, your cooled cake will crack when you try to roll it, so don’t skip this one!!

Once the cake has completely cooled, unroll it—still on the tea towel—and cover it with the filling, leaving about a half an inch on each edge to keep it from squeezing out at the seams and looking messy when you try to re-roll it. (It doesn’t take more than about 15 minutes to cool, so you could make the filling during this time if you’re in a hurry, although I like having everything ready ahead of time.) This would also be the perfect time to remove your chilled ganache from the refrigerator. It needs to be thoroughly chilled but warm enough to spread.

Carefully roll the sponge cake back up and place it on top of a large serving dish.

Give your chilled ganache a few swirls with a whisk to make sure it’s not too cold to spread. It will seem a little on the thick side, but if you do it right, it will spread without dripping off the ends, which is what you want!

Once your ganache is the right consistency, take a minute to cut off about a 1.5″ slice from one end of the yule log at an angle. Take that piece and attach it to the side of the cake so it looks a little like a branch coming out of the stump.

Gently frost the entire cake with the ganache, using a small metal spatula to carefully coat all the top edges while leaving the ends (with the cream filling) exposed. The recipe really makes a little more ganache than you’ll need, but it’s easier to work with a little extra so you don’t accidentally touch the cake and get crumbs in the frosting. Once you’re satisfied with the look, take a fork and gently run it vertically down the “log” and the “stump.”

Now, at this point, you could be done, but I think it’s fun to garnish the yule log, so here are a few ideas to get you started. Some of the sponge cake sticks to the tea towel, and I had to scrap it off with a knife (to keep from staining the tea towel). The bits of cake curled and reminded me of wood shavings from cutting down a tree. The powdered sugar made me think of snow, so I carefully transferred them to bowls and later used them to encircle the “stump” on the tray, so it looked like snowy wood chips at the base of the yule log. The curled bits of chocolate cake remained crispy and tasted great, so even part of this garnish got eaten after the rest of the yule log was gone.

One popular garnish is fresh cranberries with sprigs of fresh rosemary, but I had neither, so I used what I did have: wild rose hips, English ivy, and a sprig of pine needles. I wouldn’t use the ivy or pine needles again, because I’ve since learned that they can be toxic if swallowed. I arranged them so they didn’t touch anything, and they looked lovely, but . . . in future I’ll stick with edibles like rosemary, basil, bay leaves, or thyme. Rose hips are edible, as well as the petals and leaves, although up North where I live, there were no leaves or petals left. Thankfully, we do have an abundance of scarlet rose hips!

Cut with a sharp knife and serve soon (although it does keep surprisingly well . . . up to 24 hours I’d guess).

Long ago, Sir Isaac Watts noted that the Yule Log was an “emblem of divine light.” Sure enough! Like so many of our Christmas traditions, the radiant warmth of the “yule” (which celebrates the birth of Jesus) reminds us that Jesus Christ is the light of the world and the author of life! Where would we be without light and warmth—in our homes and in our hearts?
“In Him [Jesus] was life, and the life was the light of men. And the light shines in the darkness, and the darkness did not comprehend it” (John 1:4-5). [John] “was sent to bear witness of that . . . true Light [Jesus] which gives light to every man coming into the world” (John 1:8-9).


